Boiling Water Method | Fruits | Tomatoes and Tomato Products | Vegetables | Meat, Game and Poultry
Fish and Seafood | Stock and Soup | Troubleshooting | Care and Maintenance| Pressure Canner Comparison Guide

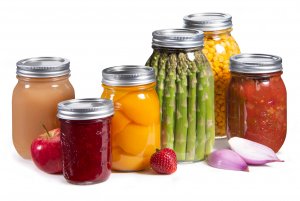
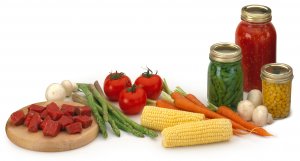
Abundant fresh fruits, vegetables, meats, poultry, and seafood are savored during the peak of the season and can also be safely preserved to enjoy year round! Adding beautiful jars of fresh, home canned food to your pantry will bring you satisfaction, as well as ease meal planning and reduce recycling.
CANNING INTRODUCTION CANNING BASICS
 For safe and confident home canning, it’s vital that you have the basic knowledge of current canning terminology and instruction. The key to successful canning is to understand the acidity and spoilage factor of the food you wish to can, as well as the acceptable canning methods to process those foods. Invisible microorganisms exist naturally on fruits, vegetables, meat, poultry, and seafood. Yet they are not a problem unless food is left to sit for extended periods of time, causing food spoilage. This is nature's way of telling us when food is no longer fit to eat.
There are four basic agents of food spoilage — enzymes, mold, yeast, and bacteria. Canning will interrupt the natural spoilage cycle so food can be preserved safely.
Molds, yeast, and enzymes are destroyed at temperatures below 212°F, the temperature at which water boils (except in mountainous regions). Therefore, boiling water canning is sufficient to destroy those agents.
Bacteria, however, are not as easily destroyed. The bacterium Clostridium botulinum produces a spore that makes a poisonous toxin which causes botulism. This spore is not destroyed at 212°F. In addition, this bacterium thrives on low-acid foods in the absence of air. Therefore, for a safe food product, low-acid foods need to be processed at 240°F, a temperature only achieved with pressure canning.
As jars of food cool after processing (by either the boiling water method or pressure canning method), a vacuum is formed sealing food within and preventing any new microorganisms from entering and spoiling the food.
Determining the Correct Canning Method
 The level of acidity in the food being canned determines which method of canning is required, either boiling water canning or pressure canning. For the purpose of home canning, foods are categorized as low acid and high acid.
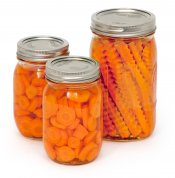
Low acid: Foods that are low acid have a pH value higher than 4.6 and include vegetables, meats, poultry, and seafood. Low-acid foods must only be processed using the pressure canning method.
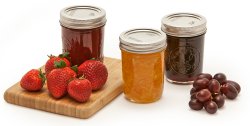
 High acid: Foods that are high acid have a pH value of 4.6 or less and include fruits, jams and jellies, properly pickled vegetables and properly acidified tomatoes. Most fruits are naturally high acid. Pickles and tomatoes, which are not high acid, are made high acid with the addition of vinegar, lemon juice, or lime juice. High-acid foods can be safely processed using the boiling water method.
Tomatoes and fruits can be safely processed using either the boiling water method or the pressure canning method. Always follow the processing method stated in the research-tested recipe..jpg)
Preplanning
 Prior to the canning season, thoroughly examine your pressure canner. Whether you have a new canner or a trusted old canner, it’s important to do a trial run with water to ensure it is functioning acceptably. As a general rule, replace the sealing ring and overpressure plug at least every three years. If your canner has a dial gauge, we recommend having it tested at your county extension office or with the manufacturer to ensure its proper operation. Finding a problem when there is a full load of vegetables in the canner can be disheartening. For specific information about caring for your canner, see Pressure Canner Care and Maintenance.
To produce home canned food that is safe for storage at room temperature, it is necessary to use a tested canning recipe. Recipes that have been handed down through the years or those found on the web are oftentimes unreliable and usually do not include scientifically tested processing procedures that are vital to a successful and safe canning project. Canning information published prior to 1994 may be incorrect and could pose a serious health risk. A tested canning recipe has been evaluated to determine the accurate processing method (boiling water canning or pressure canning) as well as the preparation instructions and processing time. Do Not can leftovers; it is not safe.
Always choose recipes from a reliable resource, such as the National Center for Home Food Preservation, your local Cooperative Extension Service, this GoPresto.com website or by calling National Presto Industries, Inc. at 1-800-877-0441.
Heat Source
Acceptable: All stovetop Presto® Pressure Canners will work on electric coil and regular gas ranges. Current models of Presto® Pressure Canners will also work on glass/smooth-top ranges.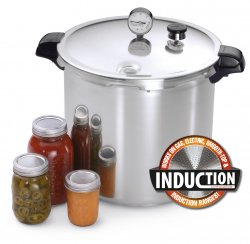
Although Presto believes that current pressure canners are acceptable for use on glass-top ranges, we recommend that you check with the owner’s manual for your range or the manufacturer before using. The Presto® Induction Compatible Pressure Canner with stainless steel clad base, Stock No. 01784, will work on induction ranges as well as electric coil, glass/smooth-top, and regular gas ranges. Please be mindful of the following tips for successful use of the canner on your glass-top or induction range:
- Use the element that most closely matches the 8-inch diameter of the canner bottom.
- Do not place the canner on two heated elements at the same time.
- Do not allow the canner to boil dry.
- Do not use the canner on the element for several hours at a time.
- To prevent scratches to the glass top, make sure that the bottom of the canner does not have scratches or areas that are rough, and do not slide or rotate the canner on the smooth-top range.
- Clean the cooking surface with a ceramic cooktop cleaner prior to and after using the canner.
- A portable induction cooktop can be used if it is not less than 1800 watts with an 8- to 10-inch diameter heating zone and a load capacity of 50 pounds.
Not Acceptable: Presto® Pressure Canners, with the exception of the Presto® Induction Compatible Pressure Canner, will not work on induction ranges because the canners are made of aluminum. Electric hot plates do not provide sufficient energy to heat a canner for the boiling water method or for pressure canning. Presto strongly discourages using outdoor LP gas burners in excess of 12,000 BTUs. These types of burners cannot be adjusted to a low enough setting to maintain the recommended amount of pressure, which can result in damage to the bottom of the canner.
Alternative: The Presto Precise® Digital Pressure Canner, Stock No. 02144, is an electric pressure canner and therefore requires no external heat source.
Assembling Supplies
 Assemble all ingredients, supplies, and equipment needed for your canning project. Carefully read, understand, and follow the recipe and canning instructions as directed. Do not substitute or omit ingredients. Always follow specific manufacturer’s instructions. See Frequently Asked Questions if you have other canning questions.
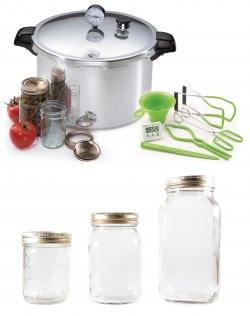
Selecting Jars
Glass home canning jars, sometimes referred to as Mason jars, are the only jars recommended for safe home canning. They are available in standard sizes (half-pint, pint, and quart jars) and will withstand the heat of a pressure canner, time after time. Note: Half-gallon jars are recommended only for canning clear juices, such as grape and apple.
Glass home canning jars offer a deep neck and wide sealing surface to assure a tight seal. Always visually examine canning jars for nicks or cracks. Recycle or discard any damaged jars. Do not use jars from commercially prepared foods because they were made for single-use only. Always use the jar size and exact processing procedures indicated in the research-tested processing recipe.
Cleaning Jars for Canning
Jars should be thoroughly washed in hot, sudsy water. Do not use wire brushes, abrasive materials, or cleansers because they may damage the glass. Rinse jars completely with hot water. To help prevent jar breakage, allow jars to stand in very hot water prior to filling with food. A dishwasher may also be used. Wash and dry jars using a regular cycle. When cycle is complete, remove one jar at a time, keeping the rest of the jars heated until needed.
 Jars do not need to be sterilized unless the food placed in them will be processed less than 10 minutes using the boiling water method, such as jams and jellies.To sterilize the jars, boil them for 10 minutes. If you live at an altitude of 1,000 feet or more, boil an additional minute for each 1,000-foot increase in altitude. If you wish, rather than sterilizing jars the processing time can be increased to 10 minutes for those jams and jellies that have a processing time of 5 minutes. The additional processing time is not harmful to most gels. Keep in mind that if your altitude is above 1,000 feet the processing time needs adjustment.
Canning Lids and Bands
 The two-piece vacuum lid is the recommended closure for home canning. It consists of a flat metal lid with a sealing compound on the outer edge and a separate metal screw band that secures the lid during processing. The bands can be used repeatedly if they remain in good condition; however, new lids must be used each time. Always prepare lids and bands according to manufacturer's instructions.
Avoid closures such as zinc caps and glass lids that require a jar rubber. These closures do not provide a proper method to determine if the seal is safe. Also, avoid commercial one-piece caps even if they have a rubber-like gasket because they are intended for one-time use only.

Selecting and Preparing Food
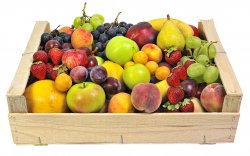
Select only produce that is at its peak quality. Produce that is overripe or damaged will not be a good canned product. Always follow exact preparation instructions such as peeling, slicing, or chopping. Altering the recipe may affect the heat penetration of the food which when canned may result in underprocessing.
There are two methods of packing food into jars: raw pack and hot pack. Recipes will indicate a packing method that is best for the food being canned. In some cases, both raw and hot pack are indicated. If given a choice, the hot pack method yields better color and flavor, especially when foods are canned using the boiling water method.
 Raw Pack: Unheated food is put directly into the jars and then covered with boiling water, juice or syrup. When raw packing meat, poultry, fish, and seafood, do not cover with liquid. Most food should be packed tightly in the jars because it will shrink during processing. However, corn, lima beans, peas, and potatoes expand during processing and should be packed loosely. Raw meat, as well, should not be packed tightly. Always refer to the recipe for specific pack instructions.
Hot Pack: Food is heated to boiling or cooked according to recipe before being packed into jars. The food is then covered with the boiling liquid. Foods that are hot packed should be put into the jars loosely because shrinkage will not occur during processing. Precooking the food allows it to conform to the jar better for a tighter, more efficient fit and prevents food from floating up in the jar during processing.
Preparing Filled Jars for Canning
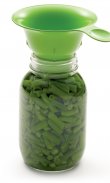
Measuring Headspace
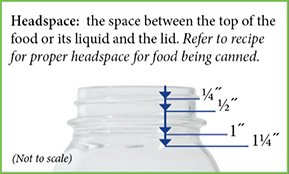 All recipes will indicate the amount of headspace necessary for the food being canned. Headspace is the air space between the top of the food or its liquid and the lid. Leaving too much headspace can result in underprocessing because it may take too long to release the air from the jar. Leaving too little headspace will trap food between the jar and the lid and may result in an inadequate seal. As a general rule, allow 1/2-inch headspace for fruits and tomatoes; 1-inch for vegetables, meats, and seafood; and 1 1/4-inch for poultry.
Removing Air Bubbles, Preparing Jar Rims, and Adjusting Lids and Bands
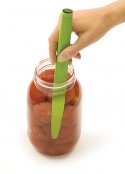 After food has been packed in jars, work quickly to remove air bubbles that have become trapped between pieces of food by moving a clean, nonmetallic spatula around the jar between the food and side of the jar. The use of metal utensils can damage canning jars and should be avoided. Immediately wipe jar rims with a clean, damp cloth to remove any residue. Place flat lid on rim of jar making sure sealing compound is touching glass. Position a band over the lid and screw onto the jar just until resistance is met. Not too tight, as air must release from the jars during processing and cooling. When all the air is released, a vacuum is formed and the lid seals.
Processing
Process food according to the research-tested canning recipe which will provide information on the processing method to use, boiling water or pressure canning. It will also state the processing time for the boiling water method or the processing pressure and time for the pressure canning method.
Cooling and Storing Jars of Food
Cooling: Carefully open cover. Using a jar lifter, remove jars from canner by lifting straight up, being careful not to tilt them. Place jars on a dry towel on countertop away from drafts leaving 1 to 2 inches of space between jars to allow for even cooling. Do not invert jars or cover with a cloth. Allow jars to cool naturally and completely. Let jars cool for 12 to 24 hours before checking the seals. It is important to test the seals. to be sure a vacuum has been formed. Press down on the center of the lid. If it is concave, or stays down when pressed, the jar is properly vacuum sealed. If a jar fails to seal, see Troubleshooting.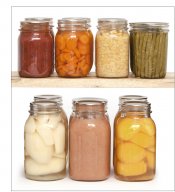
Storing: Remove bands. Wipe off any food residue from lids and jars. Do not replace bands as they may rust and become difficult to remove. Date and label jars before storing. Store canned food in a cool (between 50° and 70°F), dark, and dry place to maintain optimum eating quality for up to a year. Storing food near a heat source or with exposure to sunlight can cause loss of food quality in just weeks or a few months.
Detecting Spoilage
If up-to-date instructions and processing times and pressures are followed carefully, spoilage is uncommon. However, it is still recommended to check for signs of spoilage before tasting any canned food. Check for a broken seal, gassiness when opening, mold, sliminess, cloudiness, or unpleasant odors. If any of these signs are present, discard the food. As a safeguard against using canned low-acid and tomato products which may be affected with spoilage that is not readily detected, boil food 10 minutes for altitudes up to 1,000 feet above sea level. Extend the boiling time by 1 minute for each 1,000 foot increase in altitude. Many times odors that cannot be detected in the cold product will become evident by this method. If, after boiling, food does not smell or look right, discard it without tasting.
Additional Resources
See below for printer-friendly PDFs. Presto also offers printed home canning educational materials. For more information, call our Consumer Service Department at 1-800-877-0441.
Canning Basics (PDF)
Pressure Canning Essentials Q & A (PDF)
Canning Heat Source (PDF)
Boiling Water Method (PDF)
Parts of a Typical Canner (PDF)
Pressure Canner Care and Maintenance (PDF)
Instructions for Returning Your Presto Dial Gauge (Consumers)
Digital Canner Facts and FAQs (PDF)
Canner Comparison Guide (PDF)
Boiling Water Method | Fruits | Tomatoes and Tomato Products | Vegetables | Meat, Game and Poultry
Fish and Seafood | Stock and Soup | Troubleshooting | Care and Maintenance| Pressure Canner Comparison Guide